CHOCOLATE FUDGE SPRING CAKE


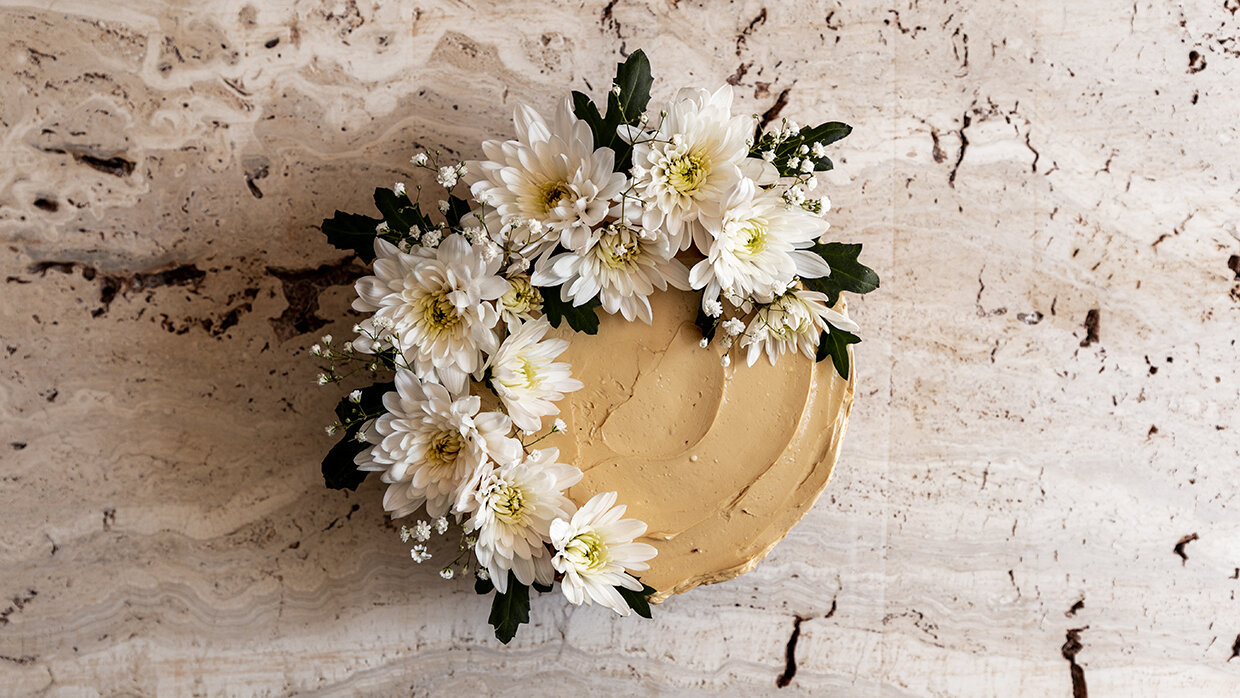
A celebration of the season with chocolate and foraged wild spring flowers.


INGREDIENTS (makes 1 layered cake of 20 cm ⌀)

For the chocolate fudge cake layers:

190 g cake flour
190 g granulated sugar
180 g good quality butter, softened at room temperature 
128 g cocoa powder, Dutch processed 
1 + ½ teaspoon (tsp) baking soda
1 tsp baking powder
½ tsp fine sea salt
2 eggs at room temperature
240 ml buttermilk 

For the whipped chocolate ganache:

200 g good quality dark chocolate with a minimum 50% cocoa
150 g heavy cream, to use for melting the chocolate
350 g heavy cream, to add it later 

EQUIPMENT 

3 spring forms of 20 cm ⌀
Stand or hand mixer
Knife
Cutting board
Whisk
Rubber spatula
Cooking pan + bowl (for the bain marie)
Mixing bowl
2 Icing bags
Icing tips with the shape of your preference (I used a round one with 14 mm ⌀ and an open star)

EXECUTION

Prepare the chocolate ganache one day in advance:

Chop the chocolate in small pieces. In ‘bain-marie’, over low fire, warm up the chocolate together with 150 g heavy cream, until the chocolate melts. Remove it from fire and emulsify it - using a beamer or a whisk. Let it cool to room temperature and then add the remaining 350 g heavy cream. Cover the ganache with a piece of plastic wrap so that it touches the surface of the ganache and let it rest overnight in the fridge. 

For the chocolate fudge cake layers: 

Grease the round spring forms with a generous layer of good quality butter and set them aside for later.
In a large mixing bowl, sieve in the cake flour, the cocoa powder, the baking soda, and the baking powder. Add the sea salt and mix well – using a whisk.
In a stand or hand mixer – with the paddle attachment on – beat the softened butter for 2-3 minutes. Then add the sugars, and the contents of the vanilla pod. Cream it for another 7 minutes until the butter is lighter in color and texture. 
Add one egg and mix until it is completely incorporated. Then add the second egg and beat to a smooth mixture.
Gradually add 1/3 of the dry ingredients (cake flour, cocoa powder, baking soda, baking powder, sea salt) and 1/3 of the buttermilk. Mix well. Continue with the rest portion of ingredients and mix well to a smooth and homogenous batter.
Divide the dough portion to your spring forms. Bake the cakes in preheated oven at 170°C (conventional) for 35-40 minutes until you insert a wooden skewer in the middle of the cakes and it comes out clean. When ready, let them cool completely on a cooling rack before frosting them.
When the cakes are cool, cut their upper part to create even cake disks for the built up.
Remove the chocolate ganache from the fridge, and let it rest at room temperature for at least 30 min before using it.
Then, in a stand or hand mixer - with the whisk attachment on - beat the ganache for 2-3 minutes until it has doubled in volume, it is fluffy and slightly lighter in color.
Transfer 2/3 of the whipped ganache portion in an icing bag with a round icing tip of 14 mm ⌀ and the rest in an icing bag with an open star tip. This is what I did but you can use any other tip of your preference.
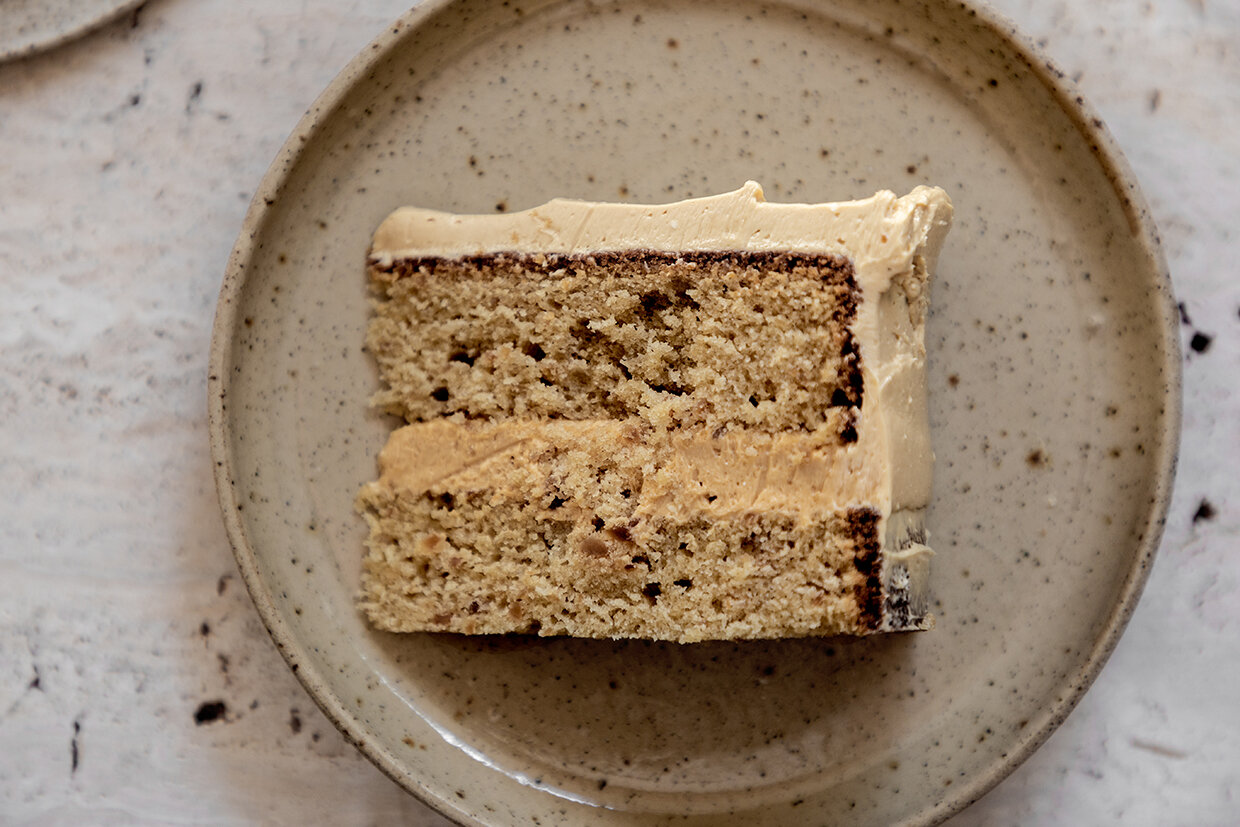
Start building the cake by placing the first cake layer on a plate and stabilize it with a small dollop of whipped chocolate ganache.
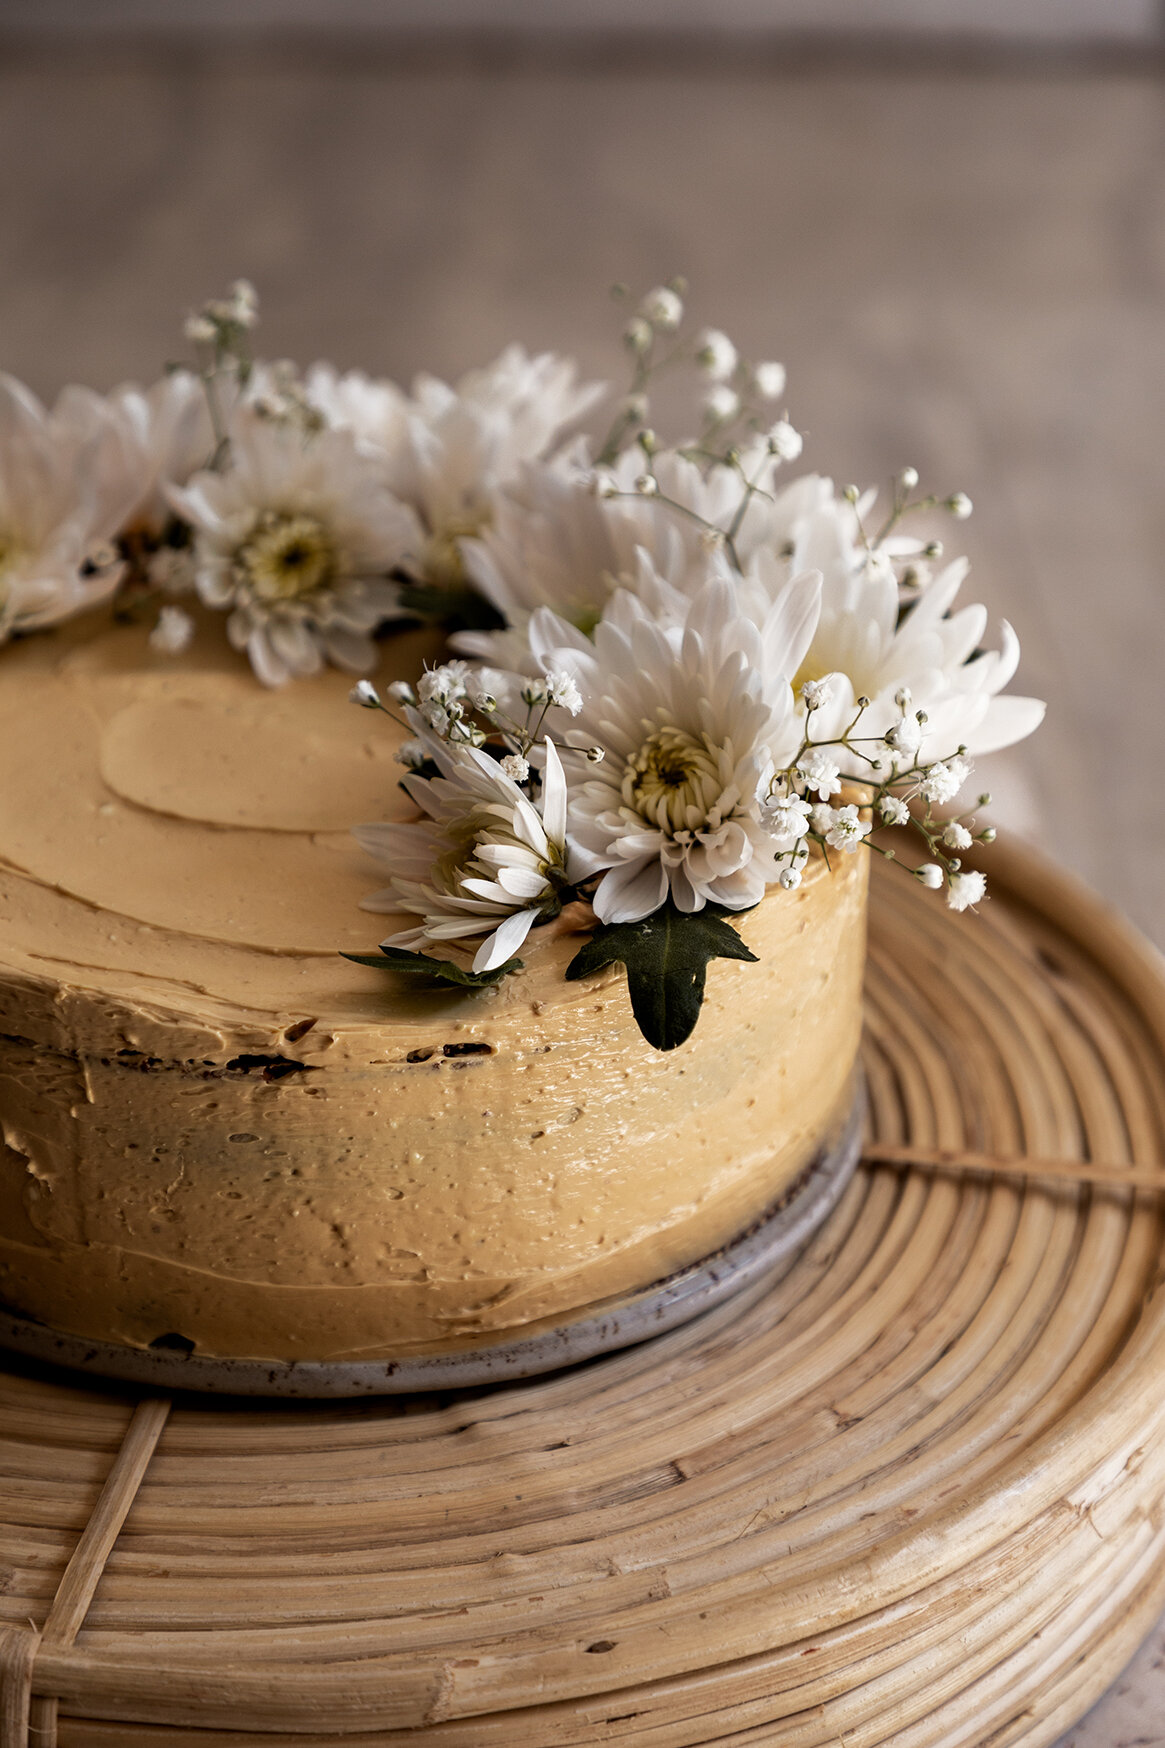
Add some of the whipped chocolate ganache to create the first whipped ganache layer by adding ganache dollops in a spiral arrangement from the outer edge of the cake disk towards the center. Continue by adding the second cake layer and then the second whipped ganache layer. Lastly add the third cake layer on top and create a pattern with whipped ganache dollops in different shapes.
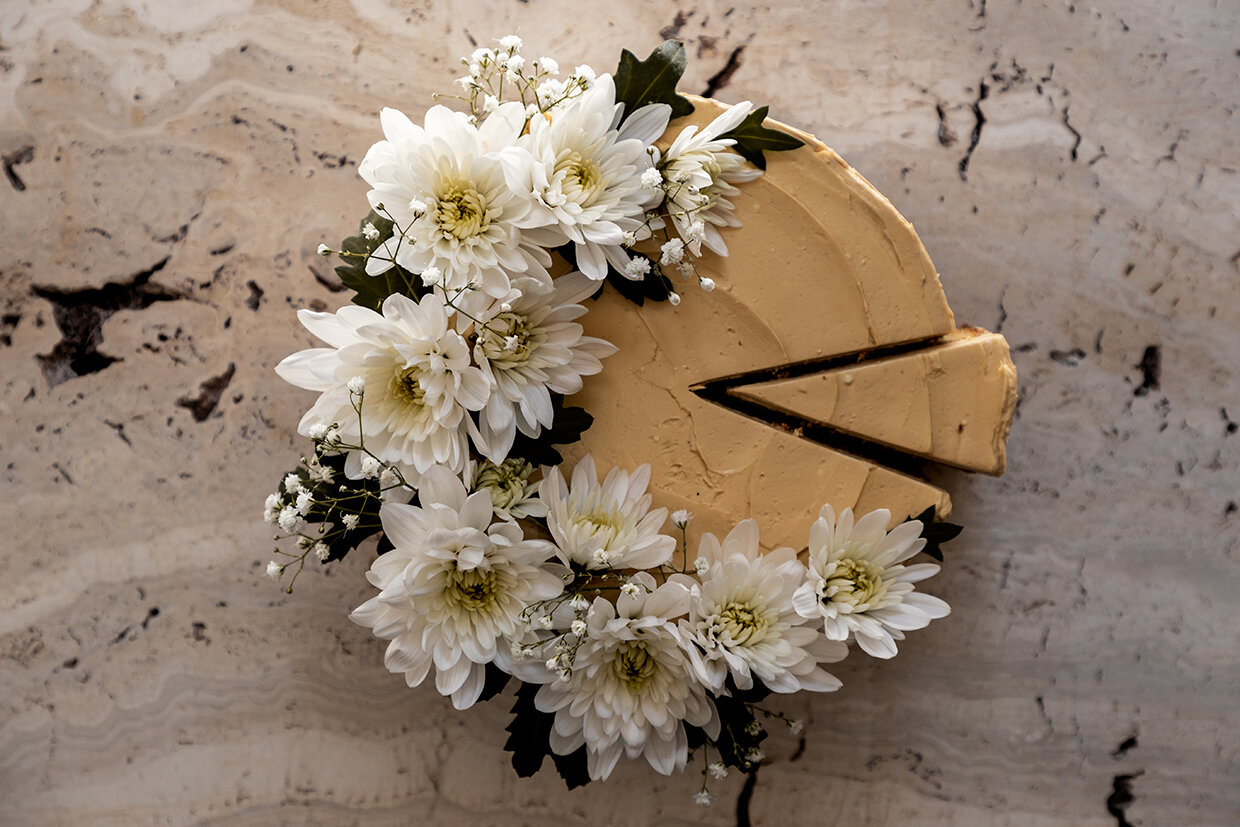
Decorate the cake with foraged spring flowers such as chamomile, dandelion and daisies.

NOTES


1: When the cake layers are completely cool, place the in the fridge for at least 30 minutes so that the containing fat in the cake firms up. In this way the cakes are going to be more compact and it will be easier to cut their tops off.
2: In order to keep the cake layers moist drizzle them with some light syrup you can make by boiling 4 tablespoons sugar with 150 ml water for 2-3 min.
3: If you don’t have icing bags use a ziplock bag and cut off one of the bottom corners of the bag and it is ready!

X

Alexandra 

TOASTED ALMONDS CAKE W/ CARAMEL BUTTERCREAM


Soft cake with a crunch that is pairing the nutty flavor of almonds with the sweet delicate texture of a caramel buttercream


toasted almond cake w caramel buttercream 01_small.jpg
toasted almond cake w caramel buttercream-2_small.jpg
toasted almond cake w caramel buttercream-4_small.jpg
toasted almond cake w caramel buttercream-5_small.jpg
toasted almond cake w caramel buttercream-6_small.jpg
toasted almond cake w caramel buttercream-9_small.jpg

TOASTED ALMONDS CAKE W/ CARAMEL BUTTERCREAM 

INGREDIENTS // makes a round cake of 20 cm circumference enough for 8 medium to 12 small servings 

For the toasted almonds cake 

190 g butter, room temperature
125 g raw almonds
100 g brown sugar
100 g granulated sugar
the seeds from one vanilla pod
3 whole eggs
300 ml buttermilk
385 g cake flour
1 tsp baking powder
½ tsp baking soda
½ tsp fine sea salt 

For the caramel buttercream 

220 ml heavy cream at room temperature
140 g granulated sugar
2 egg yolks
2 tsp cornstarch
The seeds from one vanilla pod
A pinch of fine sea salt
350 g butter, softened at room temperature

EXECUTION 

Start with toasting the almonds in a preheated oven at 170°C for 10-15 minutes until golden brown. When ready, remove them from the oven, transfer the almonds on a cool tray and let them cool completely. 

In a large mixing bowl, combine your dry ingredients; cake flour, baking powder, baking soda, and sea salt. Mix well - using a whisk. 

In a food processor, add the almonds, the two types of sugar and process until the almonds are finely chopped and the sugars almost powdered. 

In a stand or hand mixer with the paddle attachment, beat the softened butter for a 2-3 minutes and then add the almonds-sugars mix. Continue beating the mixture for another 5-7 minutes until the butter is softened and lighter in colour and texture. 

Add one egg at a time and make sure it is well incorporated in the mix before adding the next one. Slice the vanilla pod open and remove the seeds - using the false edge of a knife. Add the vanilla seeds to the mix.

Add ⅓ of the dry ingredients and ⅓ of the buttercream or milk with vinegar and mix well - using a wooden spoon or spatula. Continue with the rest of the dry ingredients and milk. Mix well until everything is well combined in a smooth batter. 

Transfer the batter in a springform of 20 cm circumference and bake it in a preheated oven at 170°C for 60 minutes until you insert a wooden skewer in the middle of the cake and it comes out clean. Let the cake cool completely on a cooling rack. 

In a pan, over medium to high heat, warm up the sugar until it melts and caramelizes to an amber colour. Remove from fire and add the heavy cream while constantly swirling the contents of the pan. Be careful when adding the cream because it will spatter due to temperature difference. It is advised that you slightly warm up the cream before you add it to the caramel.

In a mixing bowl, combine the egg yolks with the cornstarch, the contents of the vanilla pod and the salt. Stir using a whisk. Add a small portion of the caramel to the egg yolks-cornstarch mixture, stir and add this back to the caramel. Cook for about 5 minutes while constantly stirring using a whisk and until the caramel custard thickens. When the custard is cooled to room temperature, cream the butter for about 7 minutes in a stand or hand mixer with the paddle attachment on and add the custard. Beat until smooth. 

When the cake is completely cool, cut the uneven top and slice it transversely to create two even disks that will be the layers of your final cake. 

On a serving plate, place the first layer of the cake and cover it with a generous portion of caramel buttercream. Place the second cake layer on top and add a few tablespoons of the buttercream. Cover the sides of the cake with some more cream and make it smooth with a palette knife. 

Decorate the cake according to preference with flowers and toasted almonds. 

Notes: 

- I used one springform of 20 cm circumference but you could use a slightly larger one as well. In this case the baking time will be less as the cake will be less thick. I created a thick cake and cut it half to create the two cake layers. Alternatively, you could divide the batter into 2 spring forms of the same size to create two cake layers. In this case your baking time should be half as your cake will be thinner and thus will bake faster.

- If buttermilk is not easily available where you are, you can use cow or plant based milk instead adding 2 teaspoons of white wine or apple cider vinegar to compensate for the acidity . 

- It is advised to make the cake and the custard for the buttercream one day in advance to let it rest and develop its full flavour. You will also be able to cut the cake easily without running the risk of breaking it. 


X

Alexandra

CARAMEL CHOCOLATE FUDGE LAYERED CAKE


A festive cake for the holiday season to make together with family and friends. To bond and connect while handcrafting food together.


caramel choco fudge cake_01__small.jpg
caramel choco fudge cake_02_small.jpg
caramel+choco+fudge+cake_09_small.jpg

Makes one layered cake of 16 cm Ø

_CAKE DISSECTION_

This cake consists of:

  • 3 layers of chocolate fudge cake 

  • a swiss meringue caramel buttercream for the layers

  • a caramel buttercream to cover the cake and 

  • a caramel fudge sauce to glaze 

_TIME MANAGEMENT_

Make the cake layers and the creams one day in advance. The cakes have to stay in the refrigerator overnight to rest, that is important for the layered cake’s stability. Moreover, it is more relaxed to make the creams one day in advance and not on the same day that you will build the cake. 

_INGREDIENTS PER PREPARATION_

CHOCOLATE FUDGE CAKE (makes 3 layers of 16 cm Ø) 

NOTE: if you don't have round spring forms of this size - use the ones you have and adjust the number of layers to two for a form with larger diameter. Alternatively bake one thicker round cake and cut it to create disks that will be your cake layers.

285 g cake flour
285 g granulated sugar 
270 g good quality butter, at room temperature
190 g cocoa powder
2 + 1/4 tsp baking soda
1 + 1/2 tsp baking powder
3/4 tsp sea salt
3 eggs, at room temperature
360 ml buttermilk 

CARAMEL FUDGE SAUCE (for both buttercreams and glaze)

200 g granulated sugar 
90 g good quality butter, room temperature 
120 ml  heavy cream, room temperature

SWISS MERINGUE CARAMEL BUTTERCREAM 

100 g granulated sugar, extra fine
60 g egg whites (2-3 eggs)
170 g good quality butter
80 g caramel fudge sauce (recipe above)
a pinch of salt

CARAMEL BUTTERCREAM 

255 g good quality butter 
120 g caramel fudge sauce (recipe above)

PREPARATION: CHOCOLATE FUDGE CAKE  
Preheat the oven at 170 °C (conventional oven) or 150 °C (fan function). 
In a large mixing bowl sieve in the cake flour, baking powder, baking soda, cocoa powder and salt. Mix well and set aside. 
In a stand (or hand) mixer, with the paddle attachment, cream the butter and sugar. Start with beating the butter a few seconds and then start incorporating the sugar. Beat for at least 10 minutes until fluffy and lighter in colour. 
Add the eggs one by one making sure that the one is incorporated before you add the next one. Continue beating with the paddle attachment until you get a stable and smooth consistency of the emulsion. 
Add ⅓ of the dry ingredients mix that you prepared in the beginning and ⅓ of the buttermilk portion and blend. Repeat the process another 2 times by using ⅓ of the quantity of the dry ingredients mix and buttermilk each time. Blend well until a smooth consistency of the cake dough. 
Divide the batter in 3 round spring forms of 16 cm Ø or larger.
Bake the cakes for 40-45 minutes and until you insert a toothpick into the centre of the cake and it comes out clean. The baking times might differ depending on your oven and on the thickness of your cakes so always keep an eye on them during the baking process. 
When ready place them on a cooling rack and let them cool completely. Afterwards, wrap them in plastic individually and place them in the refrigerator overnight.

PREPARATION: CARAMEL FUDGE SAUCE (for both buttercreams and glaze)
In a pan, over medium fire, pour a thin layer of granulated sugar and wait until it melts. Continue with the rest of the sugar little by little until all the sugar is melted. Wait until the caramel takes an amber colour and immediately remove it from fire.

NOTE:  This is a fast process and you will need to slightly swirl the contents of the pan to ensure that the caramel browns evenly. It is very important to not use any utensil to stir the melted sugar to prevent crystallisation.

When caramel has turned amber, remove it from fire and carefully add the heavy cream little by little. It might spatter due to the large difference in temperature so be careful not to burn yourself. Swirl the contents of the pan until the cream is well incorporated in the caramel. Continue with the butter. Swirl the pan continuously and see the butter melting and blending in with the rest of ingredients. Set aside to completely cool before using it for the buttercream’s and as the final glaze of the cake. Store it in the refrigerator overnight and let it rest at room temperature (25°C) before using it for making the creams.

PREPARATION: SWISS MERINGUE CARAMEL BUTTERCREAM 
In the stand (or hand) mixer - using the paddle attachment - beat the butter until fluffy and lighter in colour (at least 7 minutes). Then add the caramel fudge sauce and the pinch of salt. Beat for another 3 minutes until all ingredients are well incorporated and set aside.
In a ‘double boiler’ over medium fire combine the egg whites with the granulated sugar and whisk until all the sugar is dissolved. When the temperature of the egg whites reaches 45°C (or when all the sugar is dissolved, the texture is not grainy due to the unmelted sugar, and the mix is hot to the touch) remove from the fire and transfer the egg whites mixture in a stand (or hand) mixer fitted with the whisk attachment. Beat for at least 5-7 minutes until glossy stable peaks are formed and the temperature of the meringue drops. 
Then change to the paddle attachment and fold the meringue in the beaten butter - caramel gently (low-medium speed) for a few seconds until all ingredients are well incorporated. Transfer it in an icing bag or an airtight container and set aside. You can store it in the refrigerator overnight and let it rest at room temperature for 1-2 hours before building the cake.

PREPARATION: CARAMEL BUTTERCREAM 
In a stand (or hand) mixer fitted with the paddle attachment, beat the butter for at least 7 minutes until fluffy and lighter in colour. Add the caramel fudge sauce and beat for another 3 minutes. 
Transfer the buttercream in an icing bag or an airtight container and set aside. You can store it in the refrigerator overnight and leave it at room temperature before using it for building the cake. 

NEXT DAY 

Get ready to assemble the cake. Take the cake layers and the creams out of the refrigerator and let them rest at room temperature. If the buttercreams are stiff after resting you can beat them for a few seconds with the mixer (paddle attachment) to make them lighter again. Cut the uneven tops of the cakes to create stable bases for your layered cake. 
Select a plate/serving tray that is going to be your layered cake base and apply a small portion - the size of a bean - of the swiss meringue caramel buttercream between the plate and the first cake layer to secure the cake on it. Apply evenly the swiss meringue buttercream on the first cake layer and place the next layer on top making sure that your cake is straight and stable. Continue with another layer of buttercream and place your last cake layer on top. 
Transfer the layered cake in the refrigerator for at least half hour for the buttercream to set.

NOTE: if you want you can slightly soak every layer with light corn syrup or simple syrup . It is usually used to secure the humidity of the cakes to keep them fresh for longer. However, the buttercream cover in this recipe will prevent the cakes from drying out, so simple syrup can be omitted.

Take the cake from the refrigerator and carefully cover it with the caramel fudge buttercream creating a straight and even surface - using a spatula. Let the cake rest in the refrigerator for another half hour. While waiting, slightly warm up the caramel fudge sauce to a more fluid consistency by paying attention that it is not too hot when you glaze the cake because the buttercream will melt. Caramel fudge holds best (not too runny, not too stiff) at around 30°C.

Take the cake from the refrigerator and finalise it with a generous portion of caramel fudge sauce. So good! Cut + serve…

Good luck you guys!

X Alexandra

P.S. post your comments + questions you might have over the recipe below in the comment section below!